
Getting Started with CARC OnDemand
The CARC OnDemand service is an online access point that provides users with web access to their CARC /home, /project, and /scratch directories and to the Discovery and Endeavour HPC clusters. OnDemand offers:
- Easy file management
- Command line shell access
- Slurm job management
- Access to interactive applications, including Jupyter notebooks and RStudio Server
OnDemand is available to all CARC users. To access OnDemand, you must belong to an active project in the CARC User Portal.
Note: We recommend using OnDemand in a private browser to avoid potential permissions issues related to your browser's cache. If you're using a private browser and still encounter permissions issues, please submit a help ticket.
Files
OnDemand provides a web-based File Explorer that can be used to upload, download, copy, delete, rename, and edit files. OnDemand has quick links to your:
- CARC home directory
- CARC project directory(ies)
- CARC scratch directories
Every user will have access to their /home1, /scratch1, and /scratch2 directories. If you have access to a project space in a project directory, you will also have access to this directory. The project directory's name will be of the form /project/<PI_username>_<project_ID>.
You can access the File Explorer from the main OnDemand dashboard. Select the directory you would like to access:

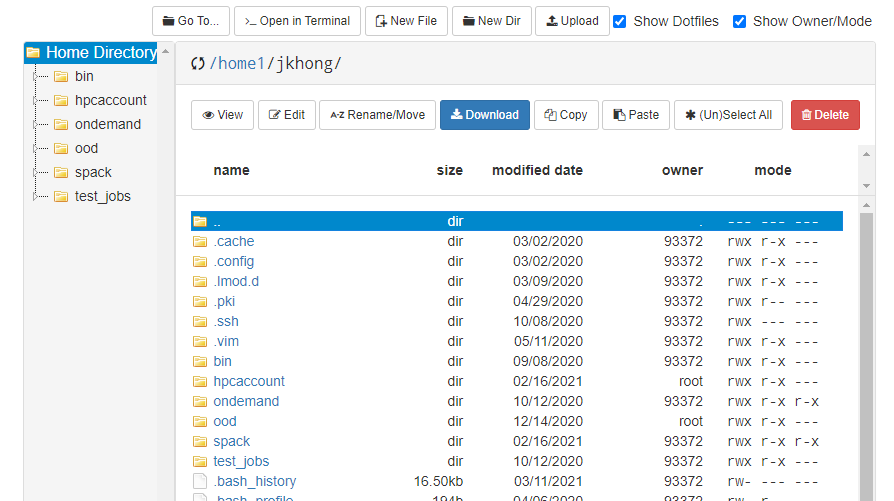
After selecting a directory (in this case, the user's home directory), OnDemand will present a graphical representation of the directory and all its contents:
Navigation
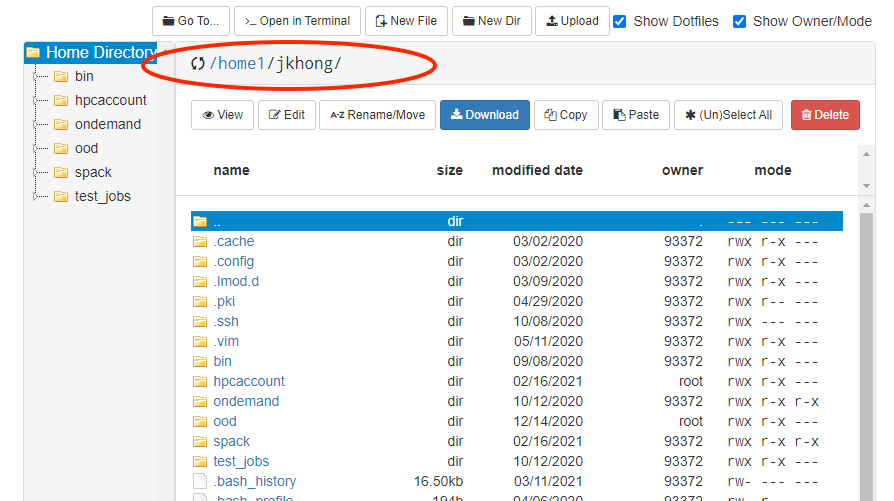
From your selected directory, you can switch to another by backtracking through the path near the top of the window and selecting the previous directory you wish to browse:
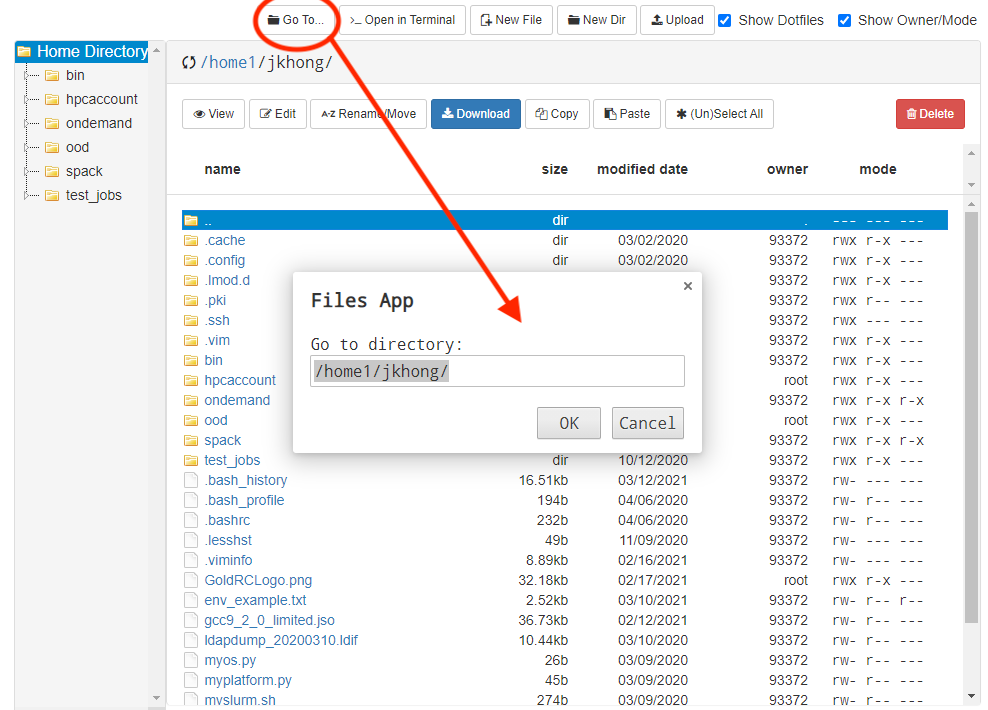
In addition, you can use the "Go To..." option in the top menu to type the path you wish to navigate to:
On the left side of the screen is a tree view of the directory structure. You can navigate this tree the same way you might on a normal desktop GUI to select the folder you wish to use.
Uploading and downloading files
OnDemand provides a basic file upload/download feature. However, this should be reserved for relatively small files (e.g., scripts and log files). For larger files, use one of the applications described in our transfer guides.
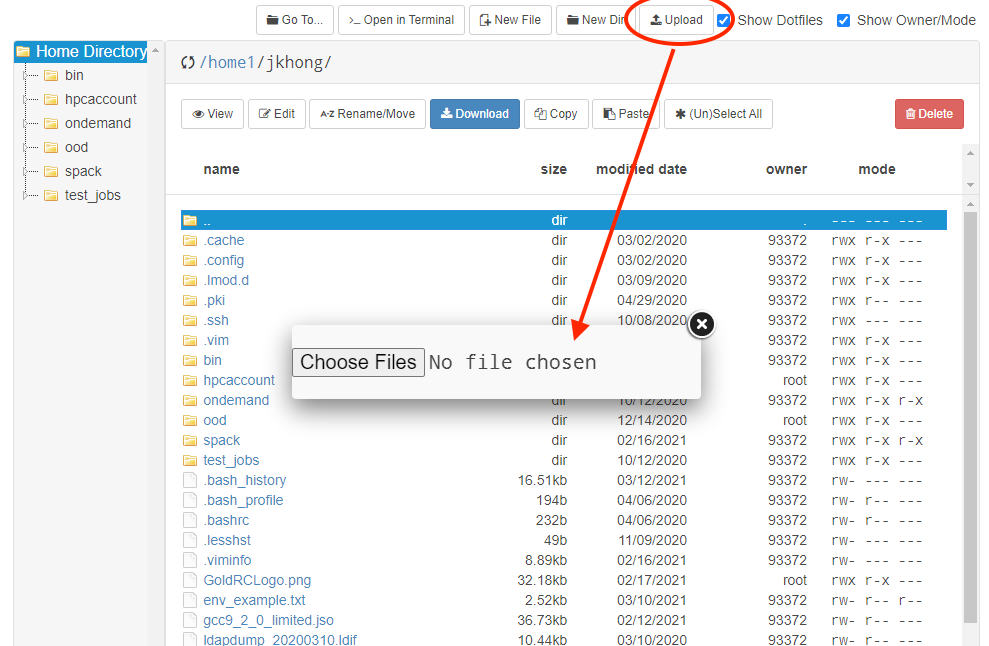
There are several ways to upload files. The first is to simply navigate to the desired destination directory in OnDemand, and then drag the file from your local computer to the OnDemand browser window. You can also click the "Upload" button to open a dialog that will allow you to navigate your local computer and select which files you want to upload:
To download files, select the file(s) in the OnDemand directory that you wish to download, and then use the blue "Download" button. You can select multiple files by holding down the Shift or Ctrl (or Command on a Mac) key as you select the files. If you select multiple files or a folder, OnDemand will zip the files and download a single .zip archive to your computer.
File operations
Most file operations can be accomplished by selecting a file in the File Explorer and choosing the desired operation from the main menu:

You have the ability to perform the following file operations in OnDemand:
- View
- Edit
- Rename/Move
- Download
- Copy
- Paste
- (Un)Select All
- Delete
Jobs
OnDemand provides two related job managment tools. The Active Jobs tool allows you to monitor queued and running jobs and the Job Composer tool allows you to create and submit jobs via your web browser:

Active Jobs
The Active Jobs tool will show you all jobs currently in the queue (running or queued), regardless of how the jobs were submitted:
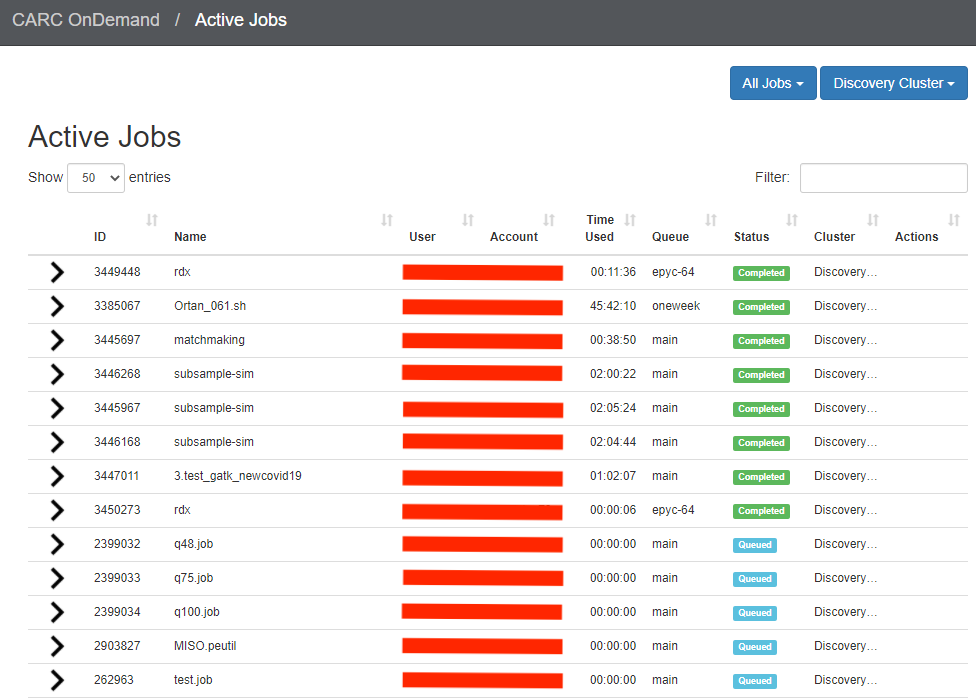
You can use the dropdown options at the top of the page to toggle between your jobs, all jobs, and the different clusters. The screenshot above shows all jobs on both clusters. You can also use the "Filter" tool to filter jobs based on sytems (Discovery or Endeavour), status (running, queued, or hold), user, project account, etc.
If you click the arrow to the left of a job entry, you can get more information about the job, including information about the node(s) on which the job is running.
Job Composer
Selecting Job Composer in the Jobs menu will open the Jobs page, where you can create new jobs and submit them to the cluster, and inspect the results of jobs submitted via this tool.
To create a new job using the Job Composer, from the Jobs page, click the "+ New Job" button:
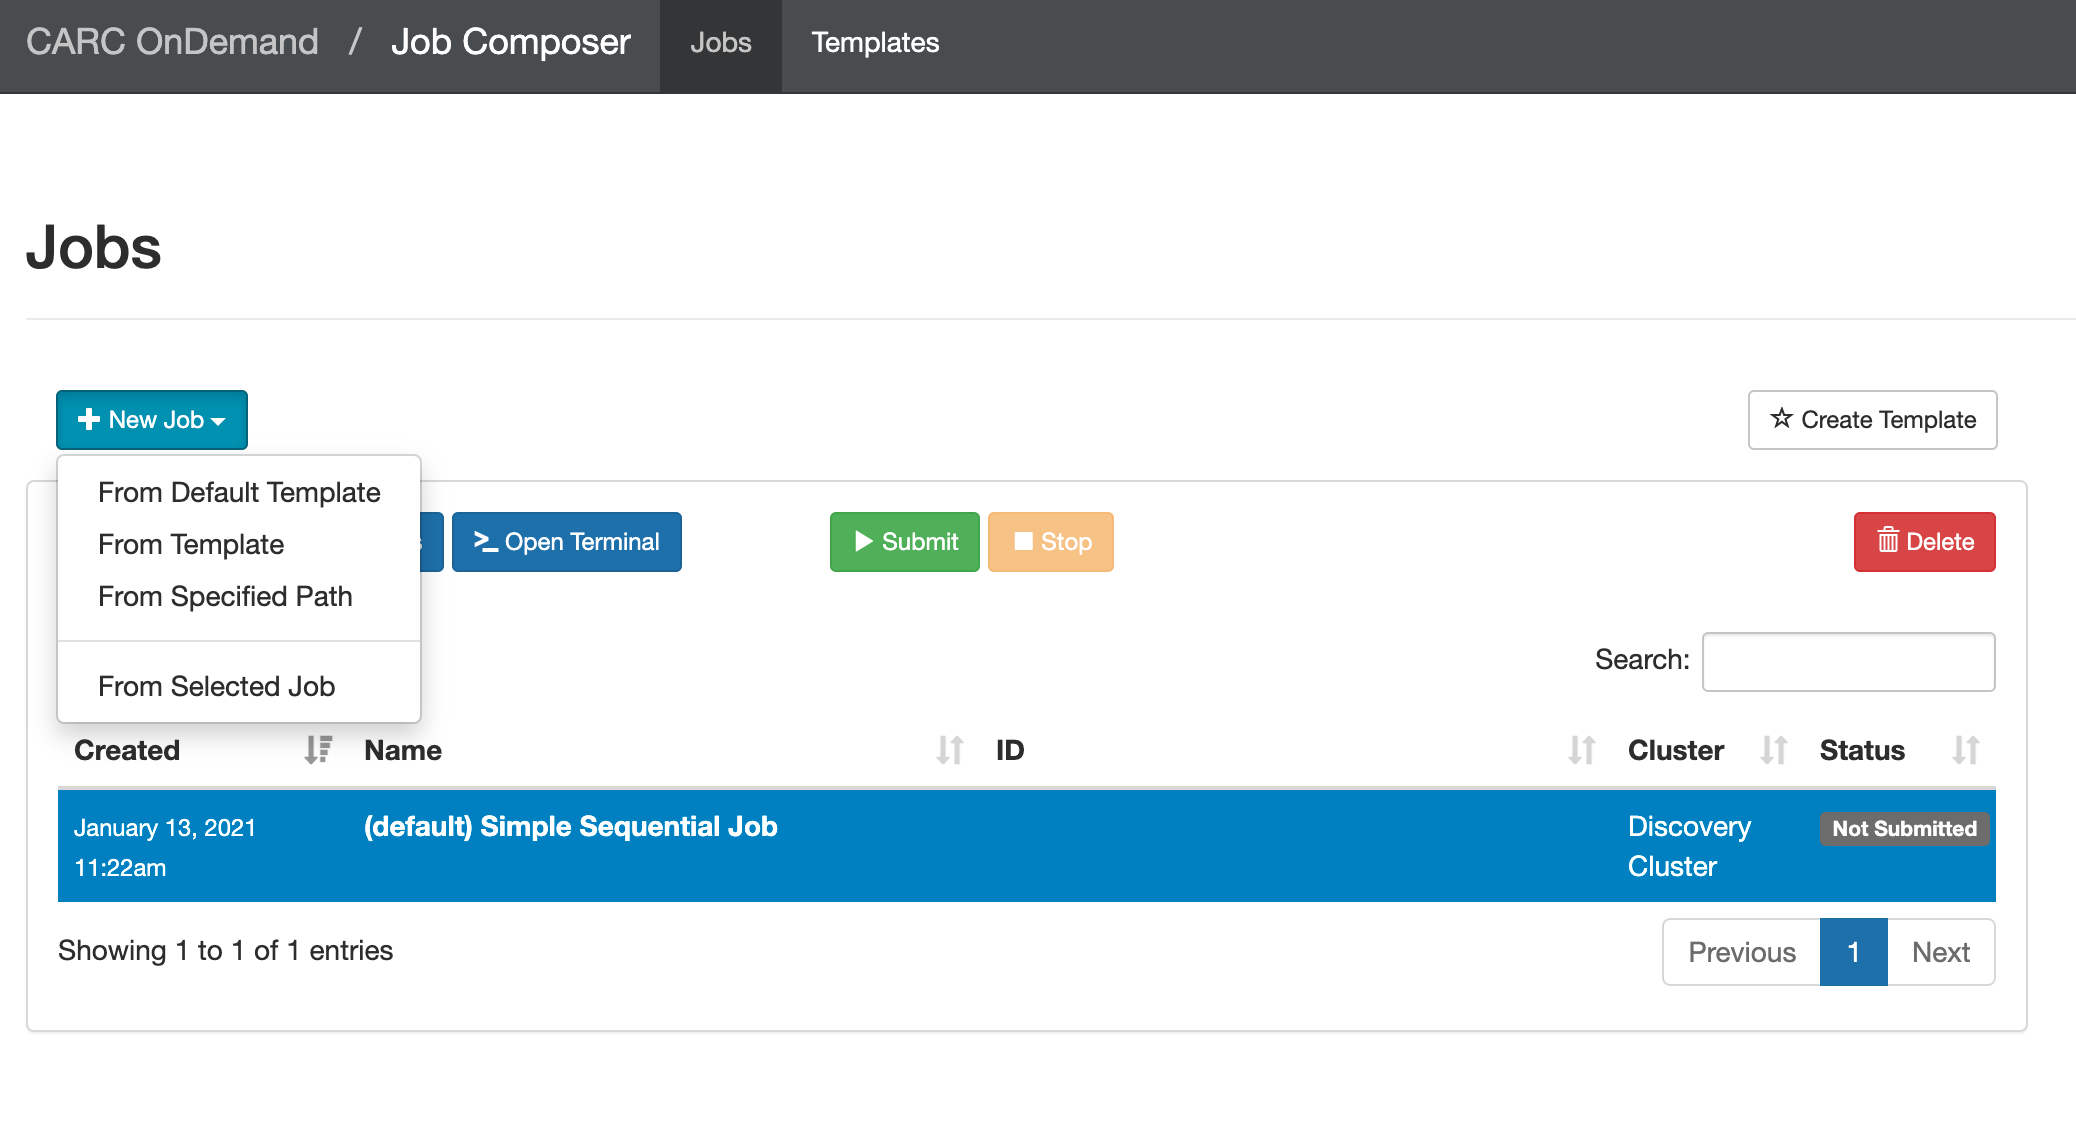 There are four ways to create a job:
- "From Default Template" creates a Simple Sequential Job (the default job template)
- "From Template" creates a new job by copying from an existing job template directory
- "From Specified Path" creates a new job based on the source path to a directory on Discovery/Endeavour
- "From Selected Job" creates a new job from a previously-run job directory
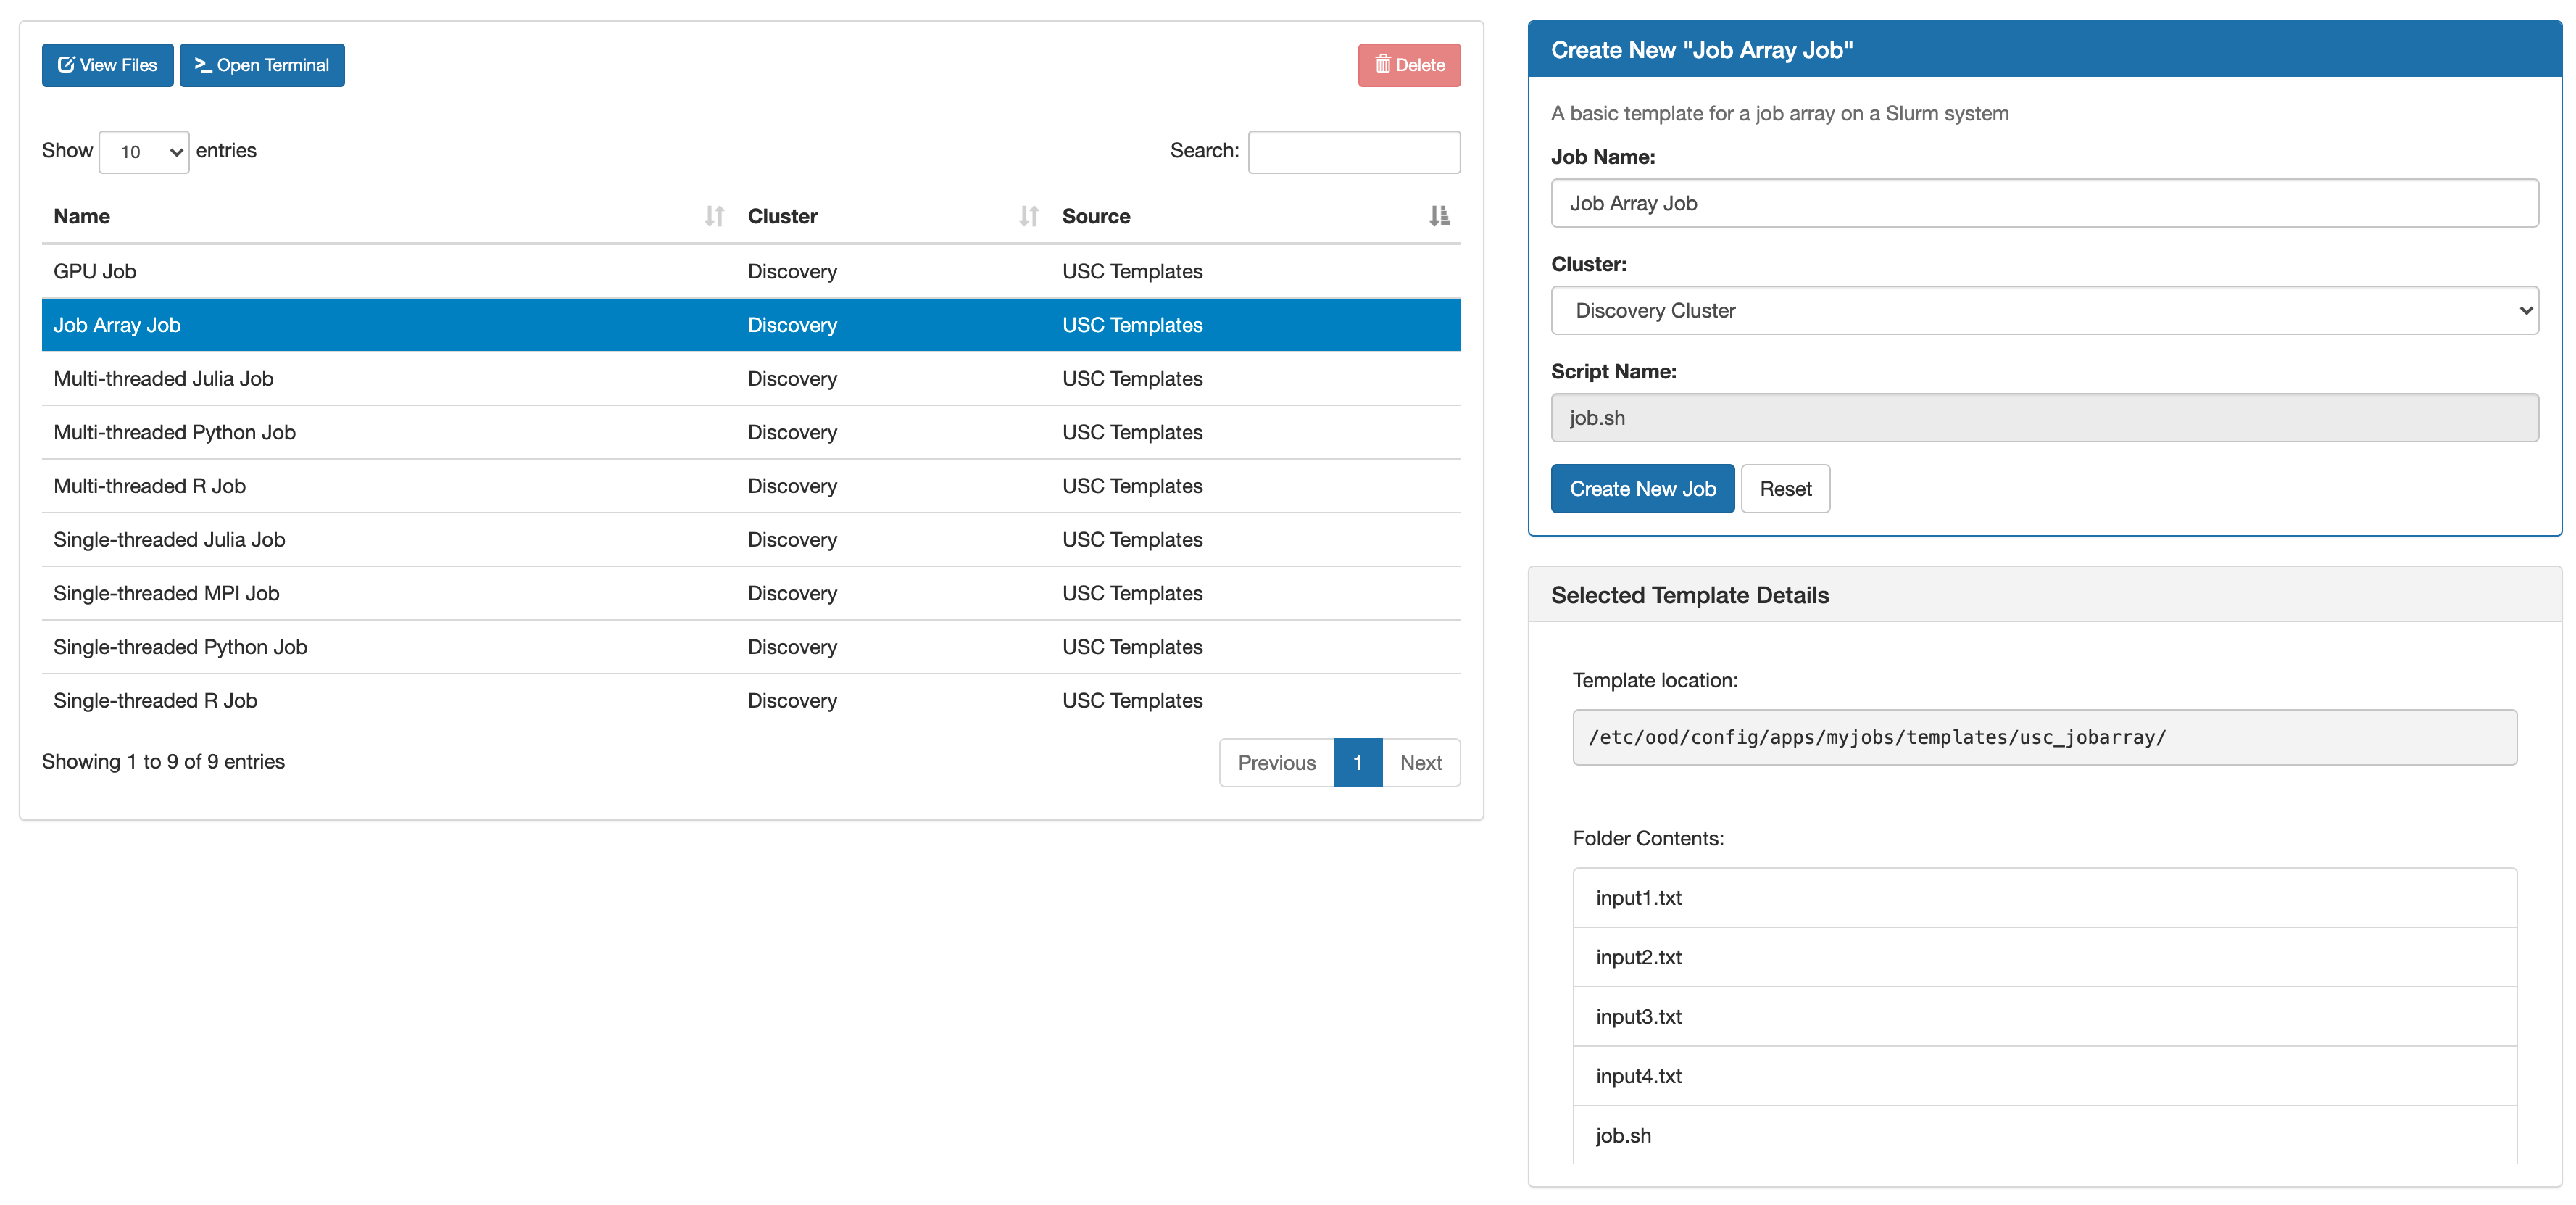
For example, to create a new job from a job template, select "New Job->From Template". Next, select the job template to copy (in this case, "Job Array Job"), then click the blue "Create New Job" button on the lefthand side of the page:
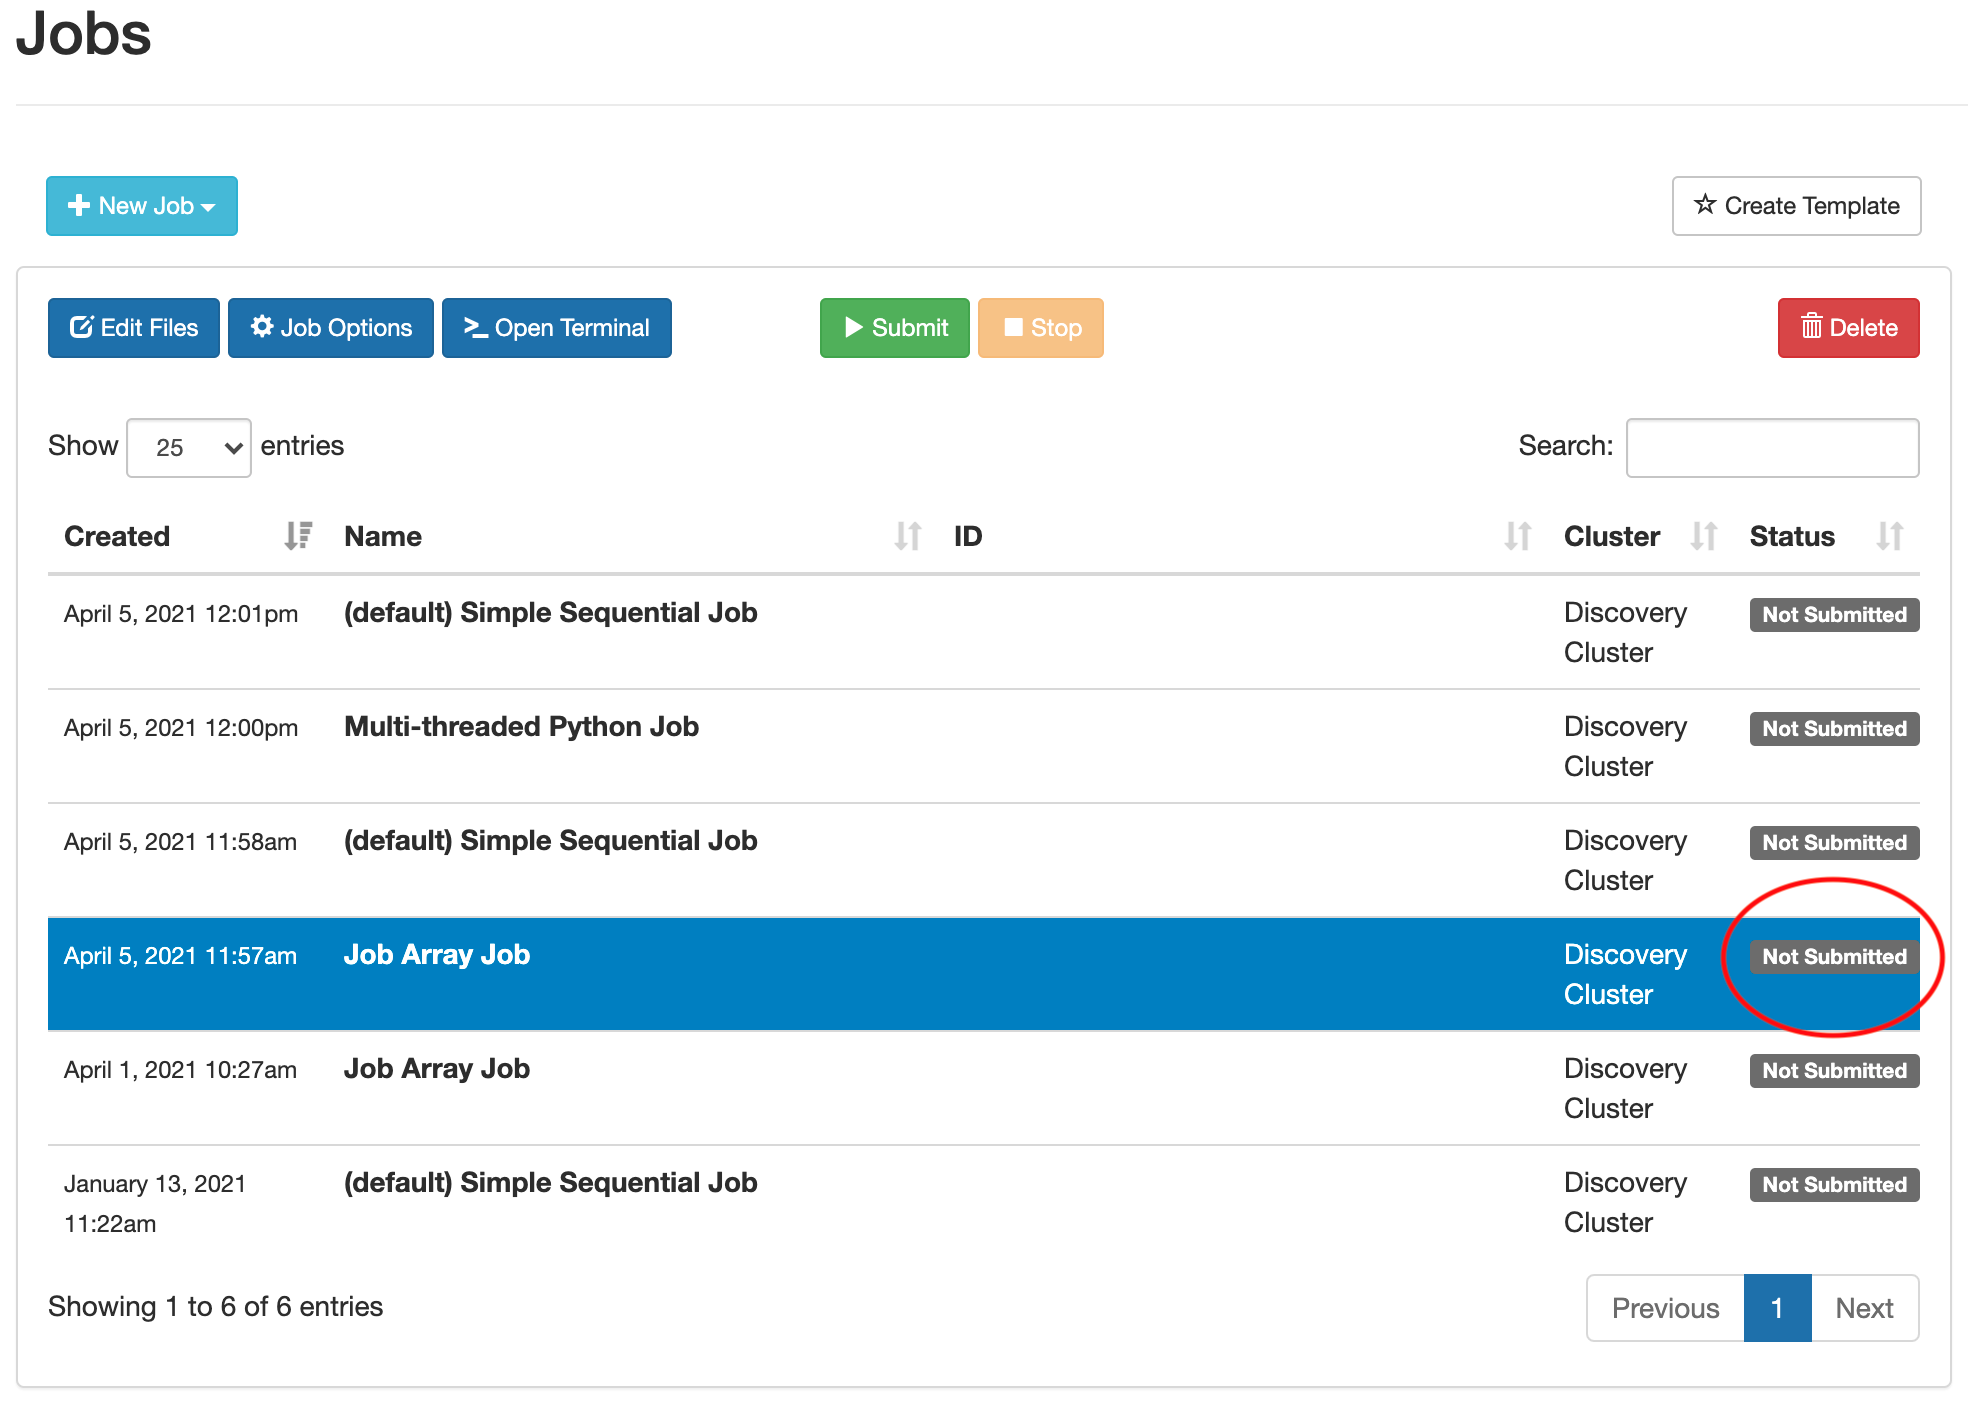
The template directory will be copied and a new job row will be added to the top of the jobs table on your Jobs page:
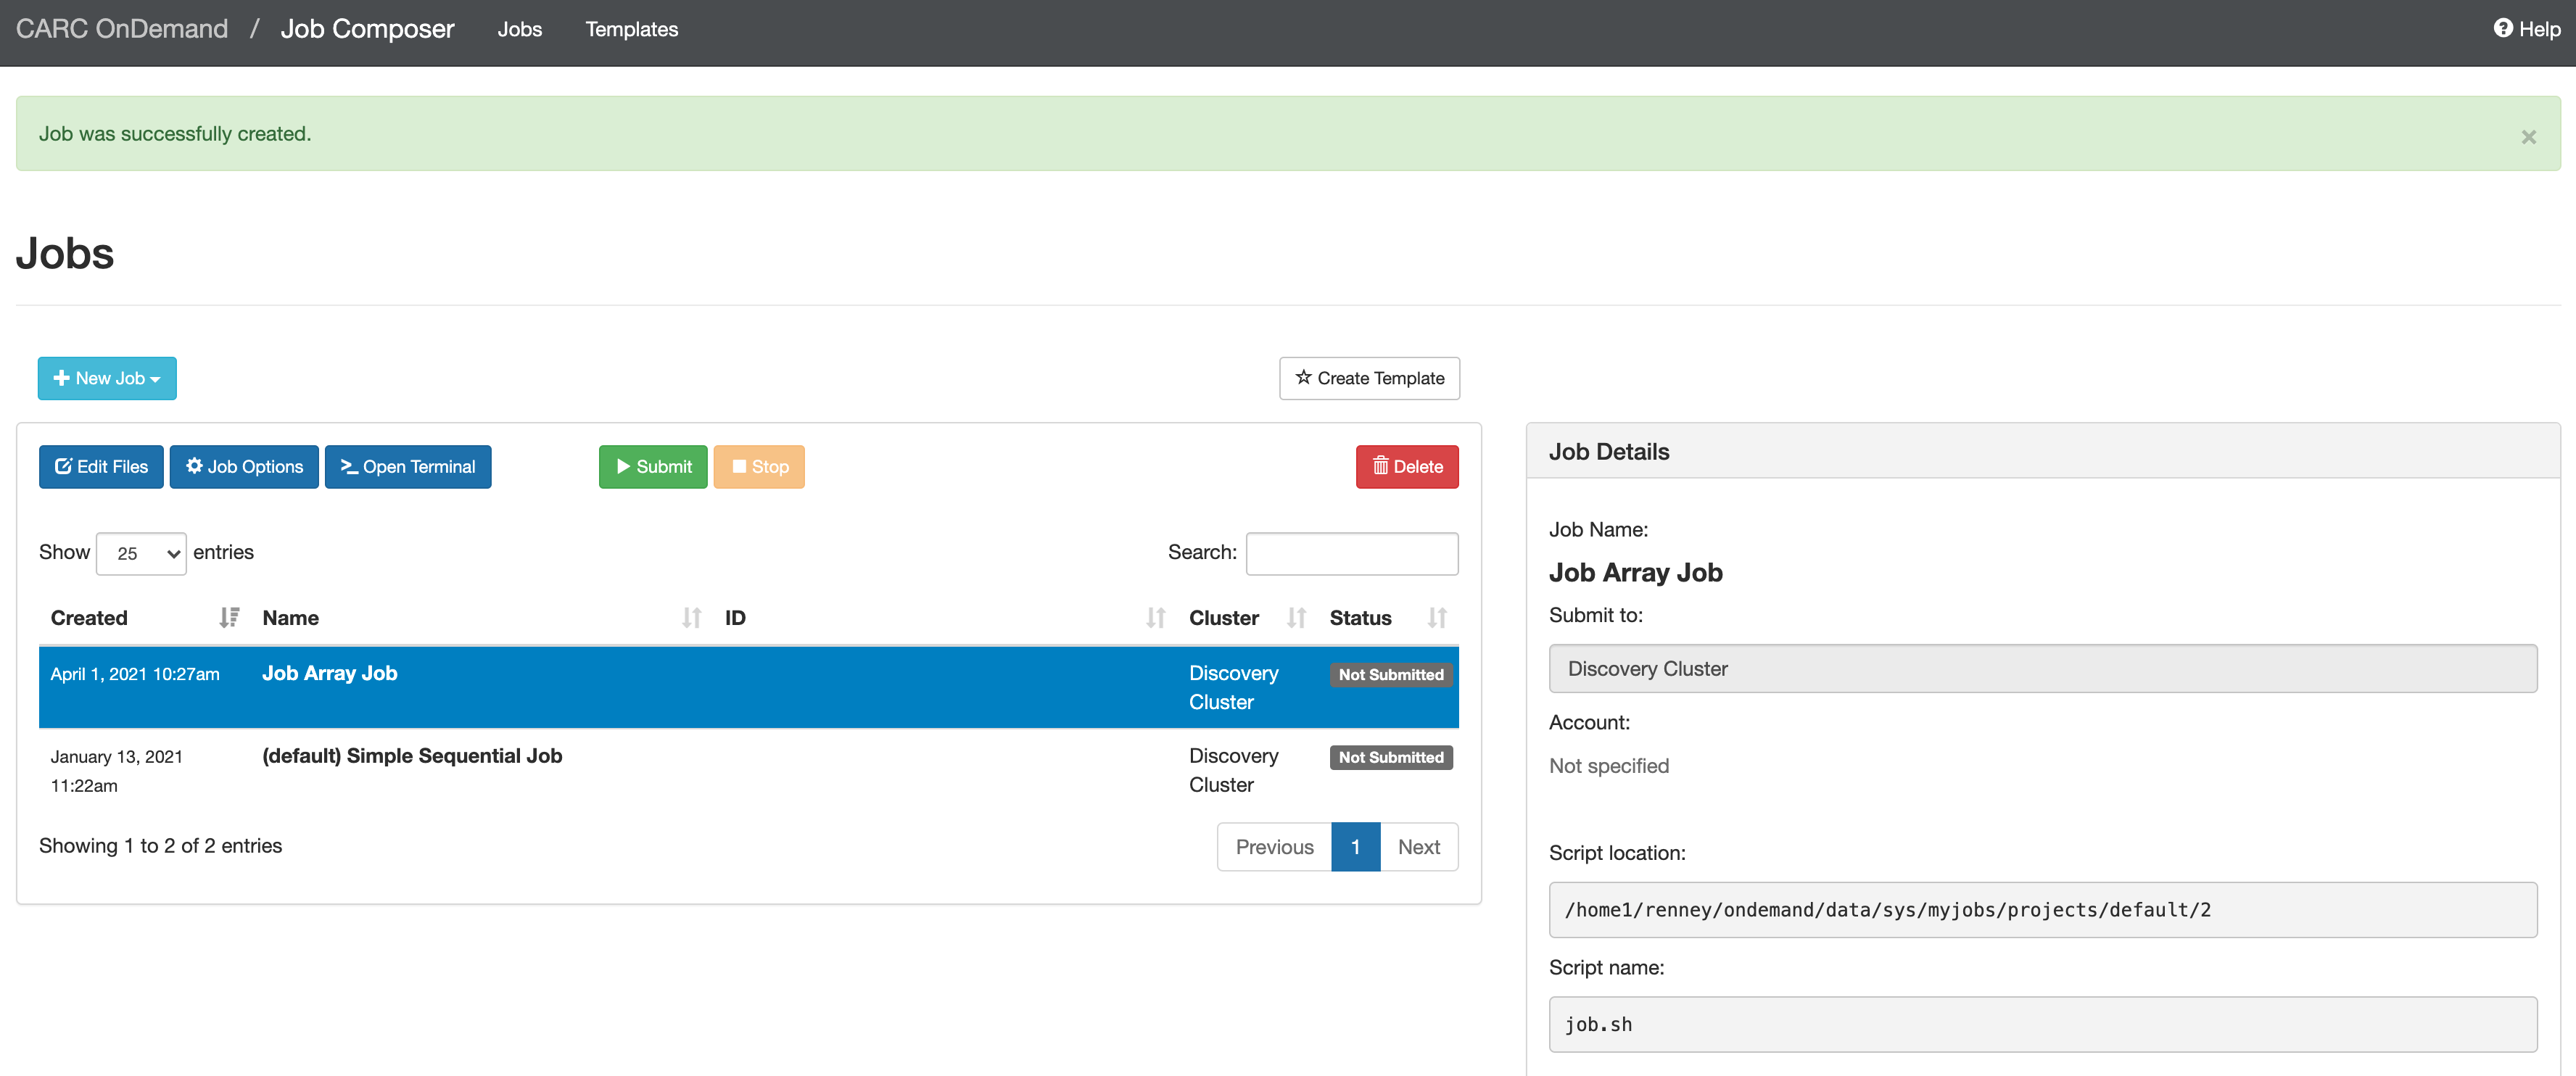
From the table, select the job you just created, then modify and/or add any files to this job by clicking "Edit Files":
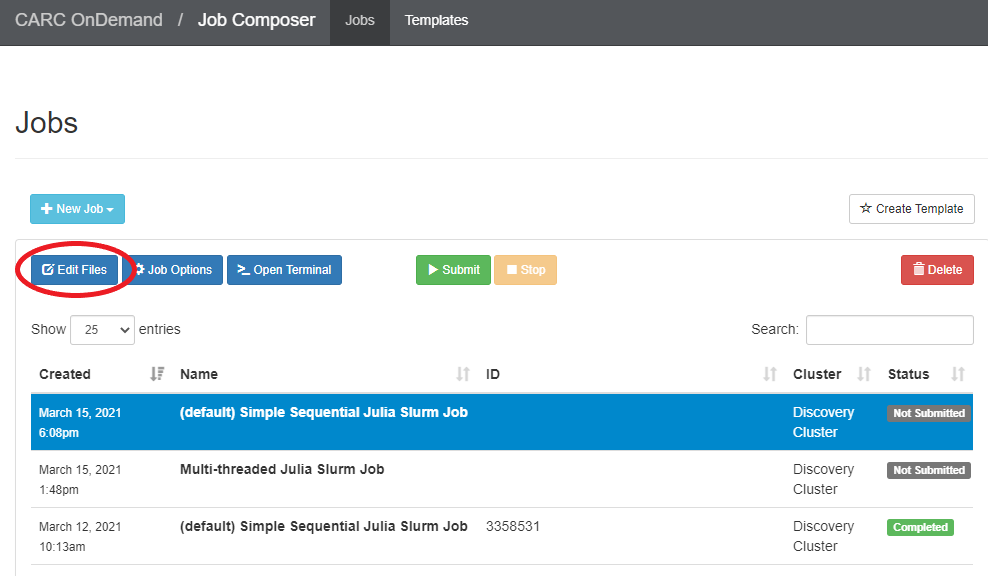
You will be taken to the File Explorer, where you can upload any files required for your job. See the "Files" section of this user guide above for instructions on uploading files.
If you need to make changes to a job's settings, select the job and click "Job Options": 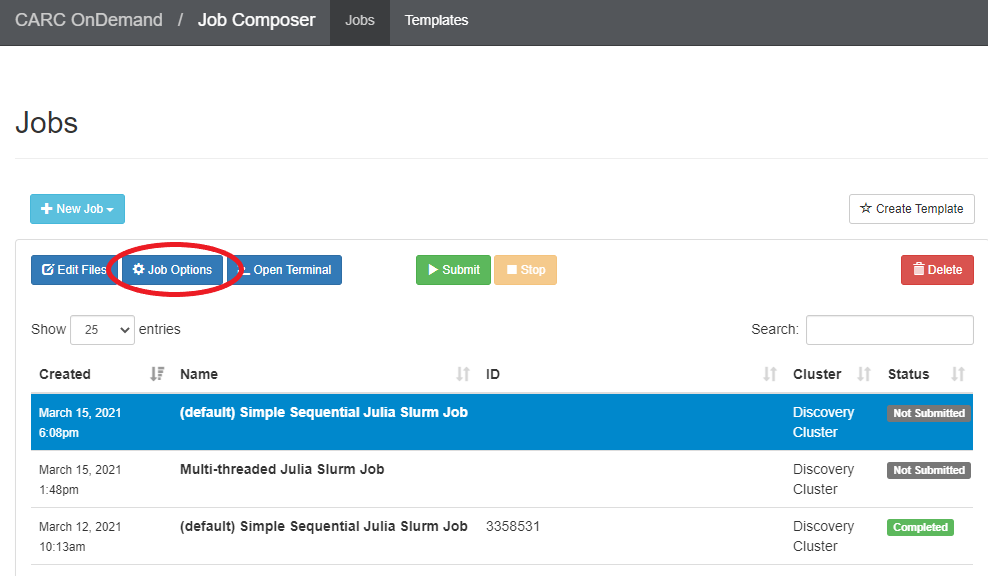
Here, you can change the job name, cluster, job script, project account, or job array specification: 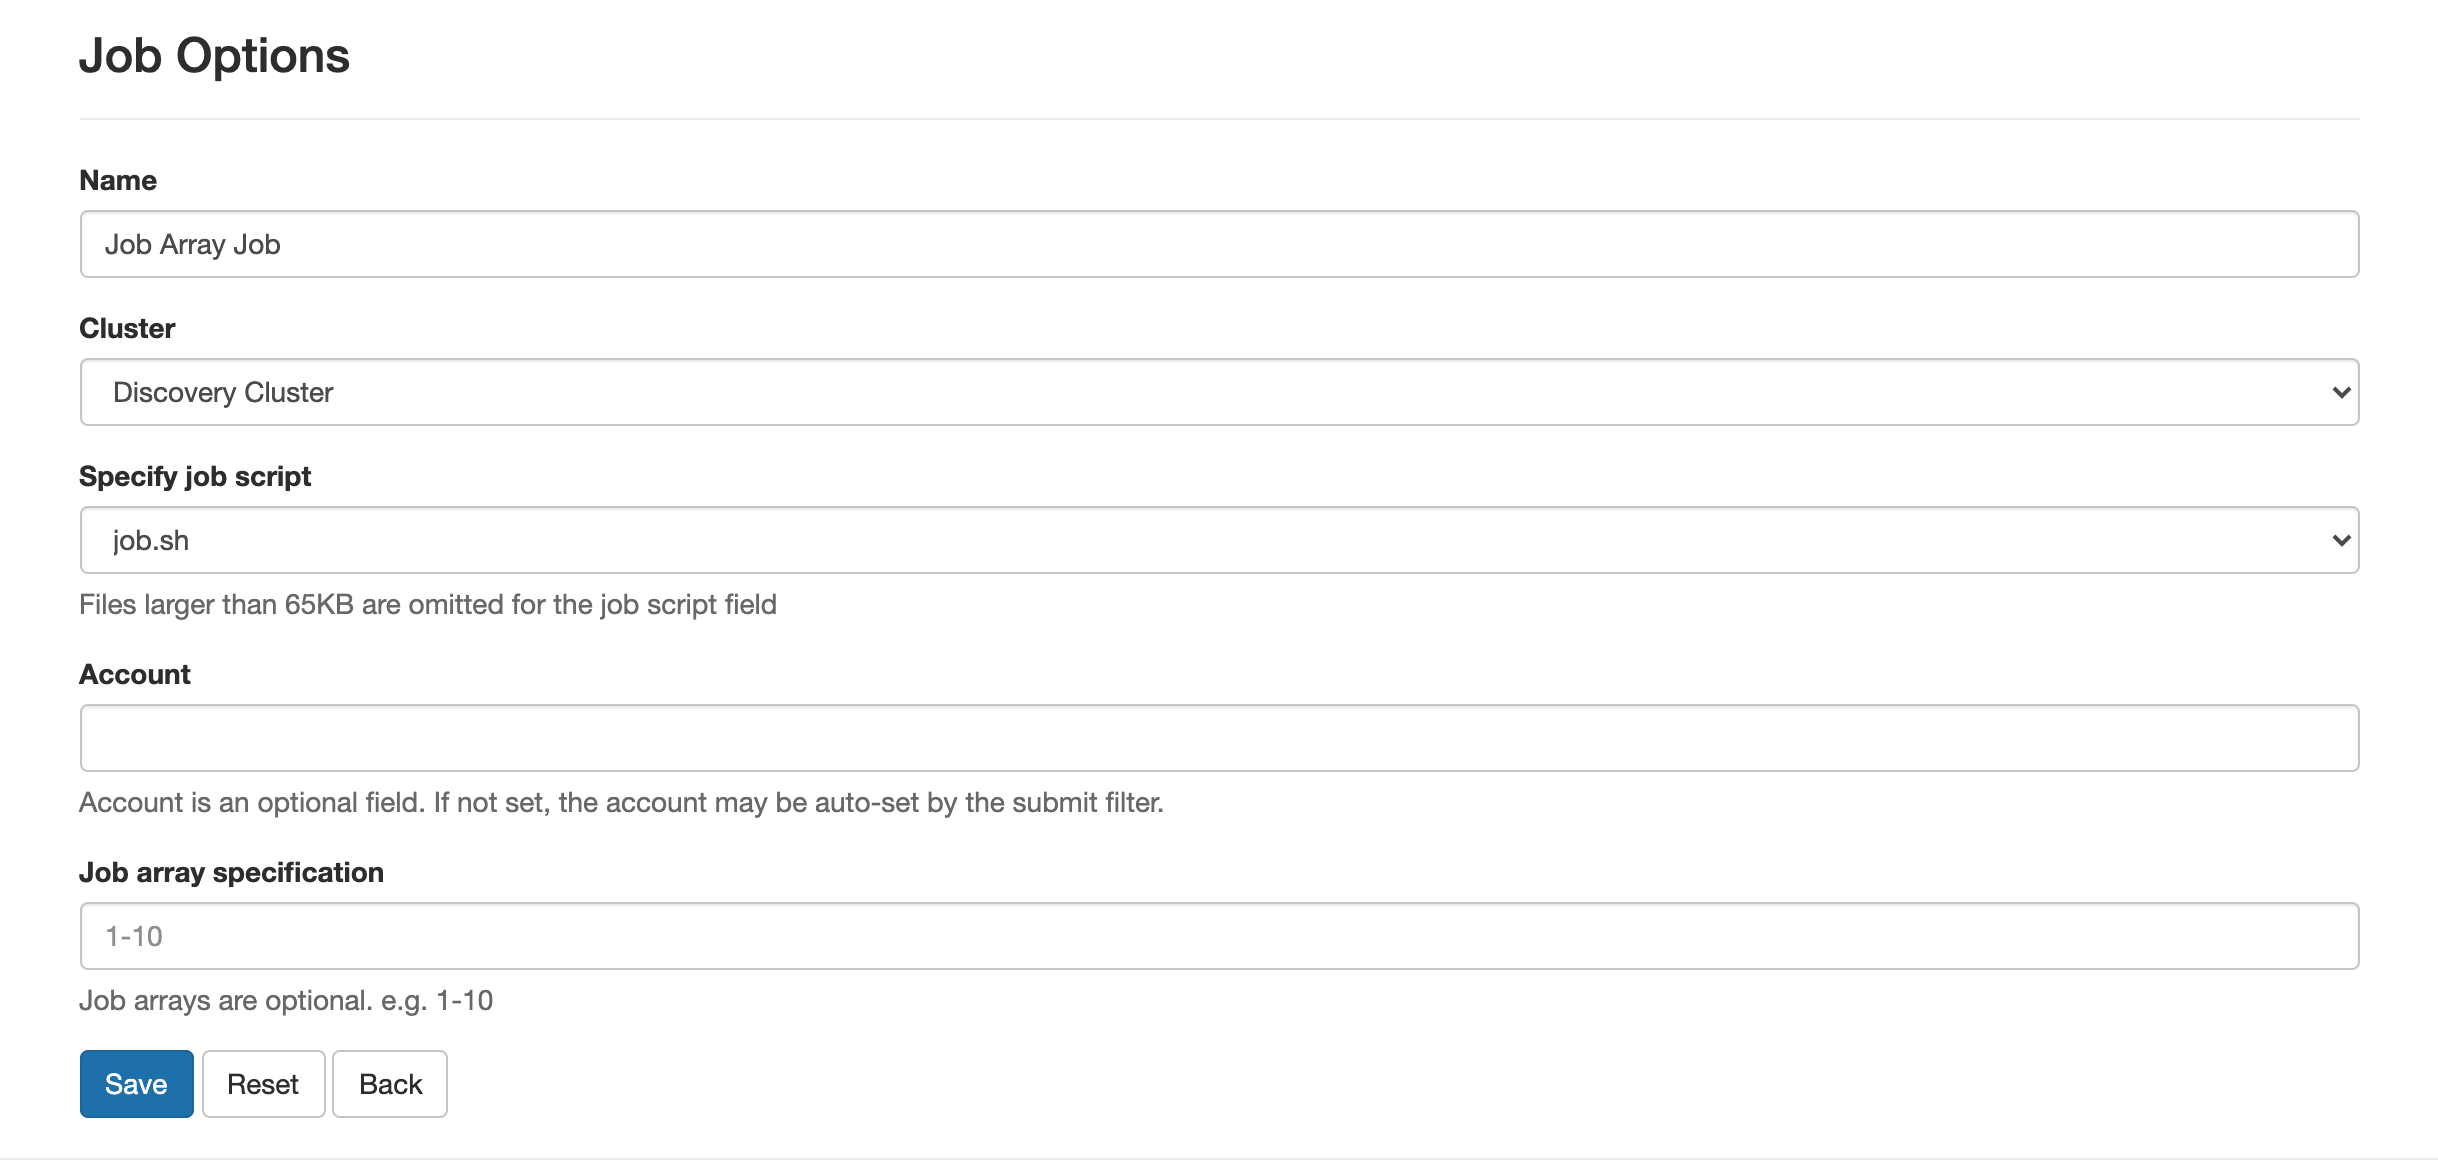
After you've created your job, added files, and changed any settings as necessary, you can submit the job using the green "Submit" button from the Jobs page. You can also similarly use the yellow "Stop" button to stop a running job, or the red "Delete" button to delete a job from your list:
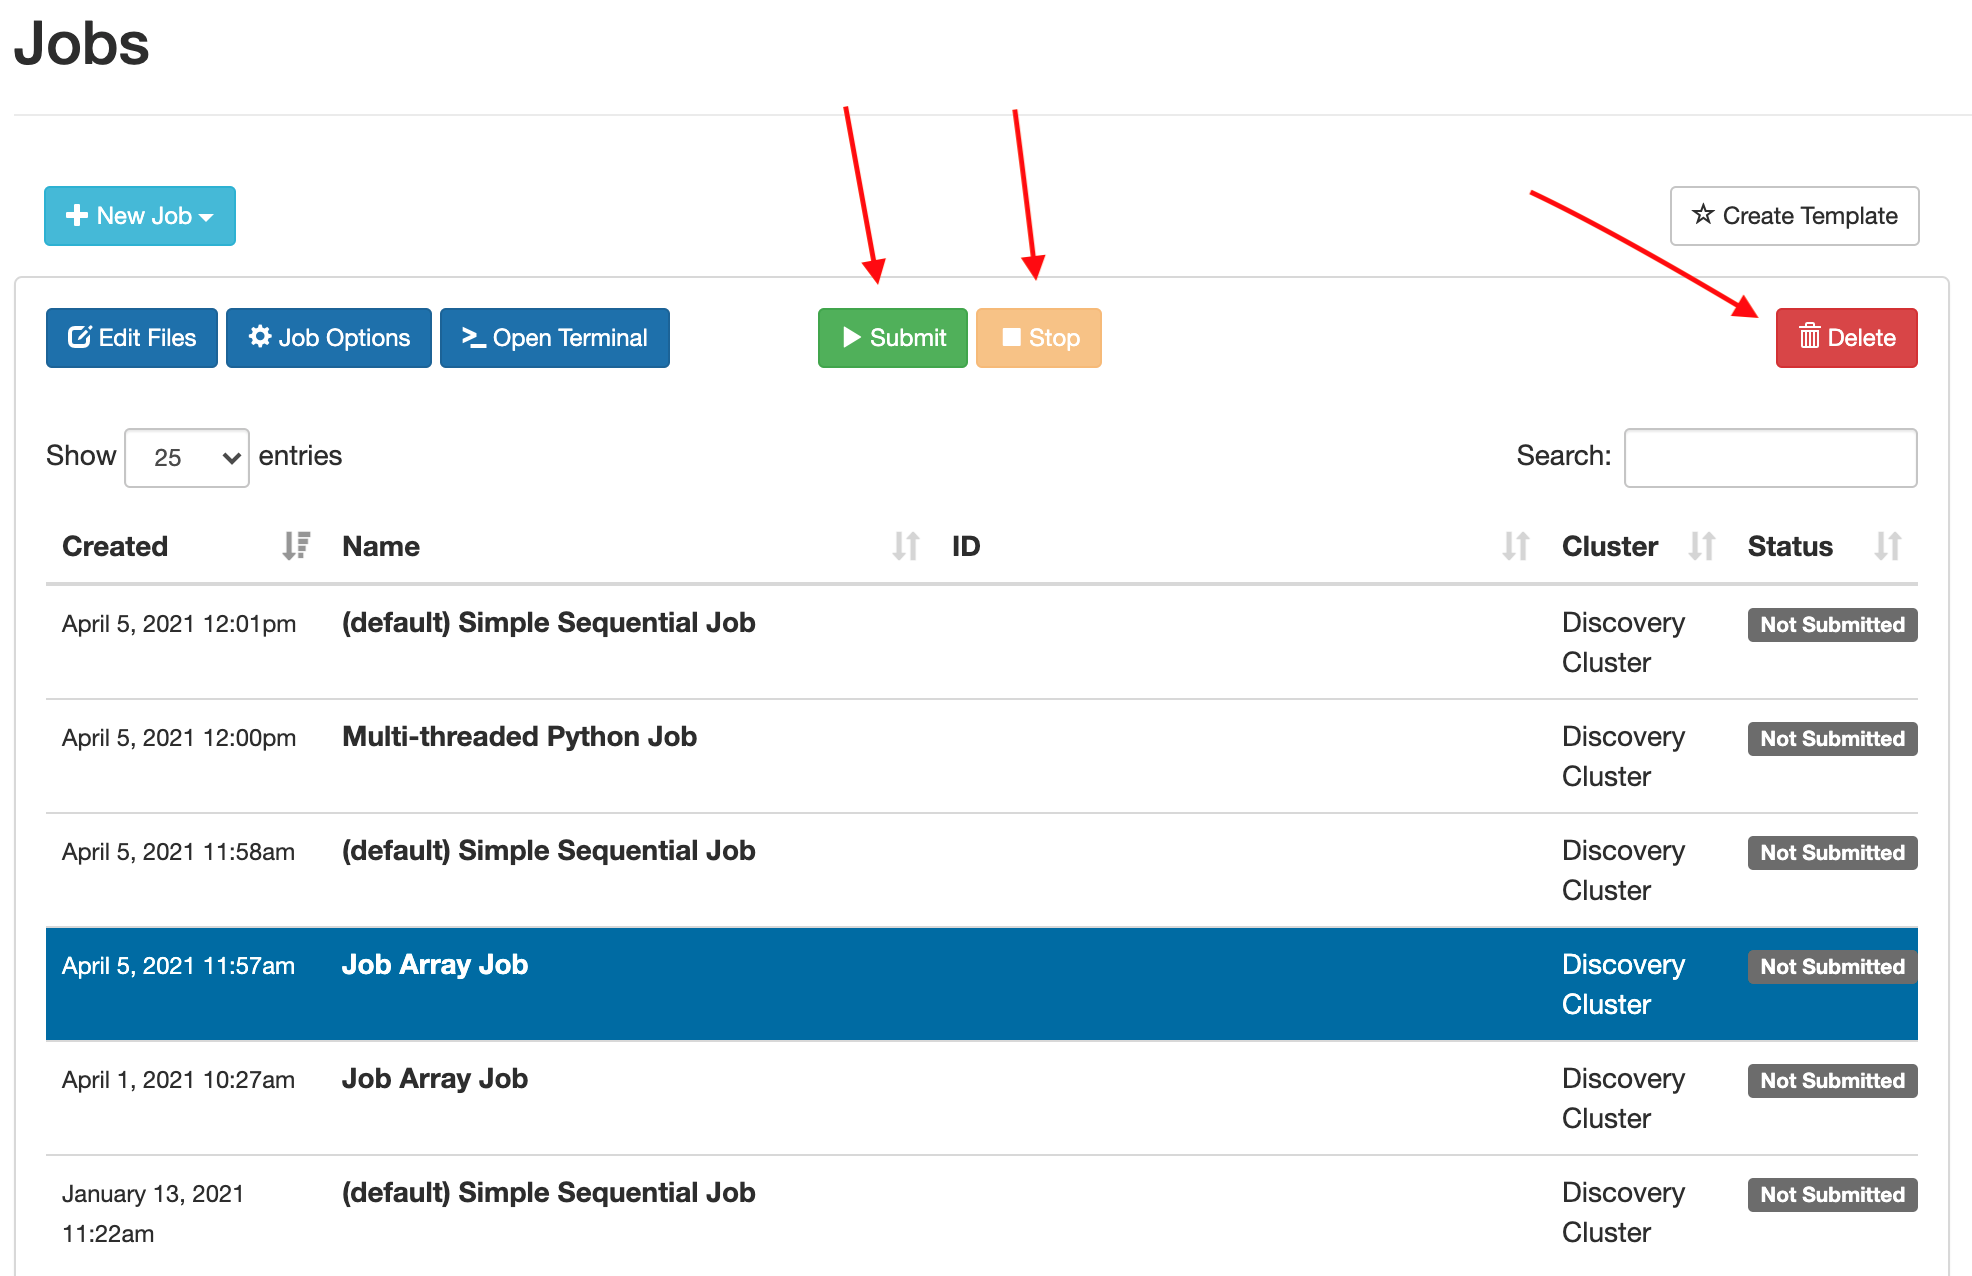
You can also monitor the job status on the Jobs page:
Currently, you must reload the page to see job status changes.
Shell access
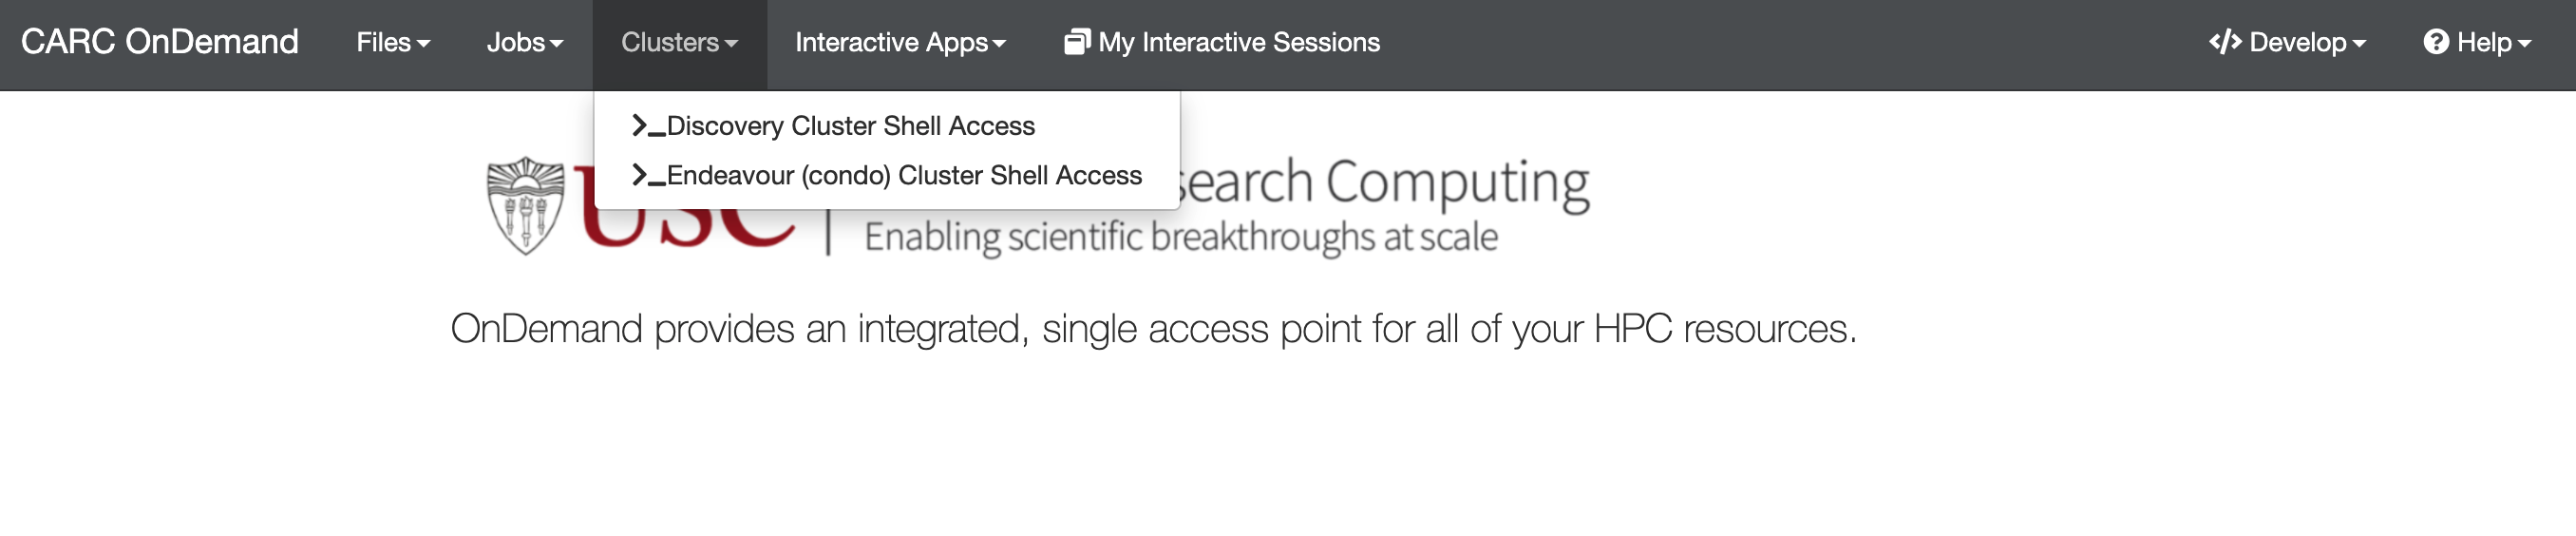
OnDemand provides the ability to SSH into the Discovery and Endeavour clusters from inside your web browser using the Clusters tool:
Discovery cluster
To access the Discovery cluster:
- Select "Clusters->Discovery Cluster Shell Access" from the dropdown.
- Duo two-factor authentication is required to access Discovery. You will see a Duo two-factor authentication prompt upon launching the shell:
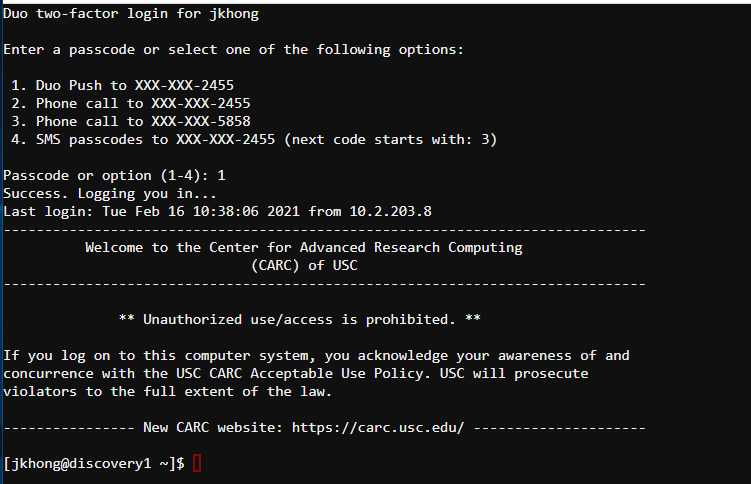
Shell access will be connected to the Discovery login node. For detailed information on the Discovery cluster, see the Getting Started with Discovery user guide.
CARC file systems (/home, /project, /scratch1, and /scratch2) can be accessed using the OnDemand File Explorer — see the "Files" section of this user guide above.
Endeavour condo cluster
Note: To SSH into the Endeavour cluster using OnDemand, you must belong to a CARC project with an Endeavour allocation.
To access the Endeavour cluster:
- Select "Clusters->Endeavour (condo) Cluster Shell Access" from the dropdown.
- Duo two-factor authentication is required to access Discovery. You will see a Duo two-factor authentication prompt upon launching the shell.
Shell access will be connected to the Endeavour login node. For detailed information on the Endeavour cluster, see the Getting Started with Endeavour user guide.
CARC file systems (/home, /project, /scratch1, and /scratch2) can be accessed using the OnDemand File Explorer — see the "Files" section of this user guide above.
Interactive Apps
We currently offer JupyterLab and RStudio Server access on both the Discovery and Endeavour clusters.
To start an interactive session in OnDemand, from the Interactive Apps tab, select either JupyterLab or RStudio Server to be taken to the session creation page:
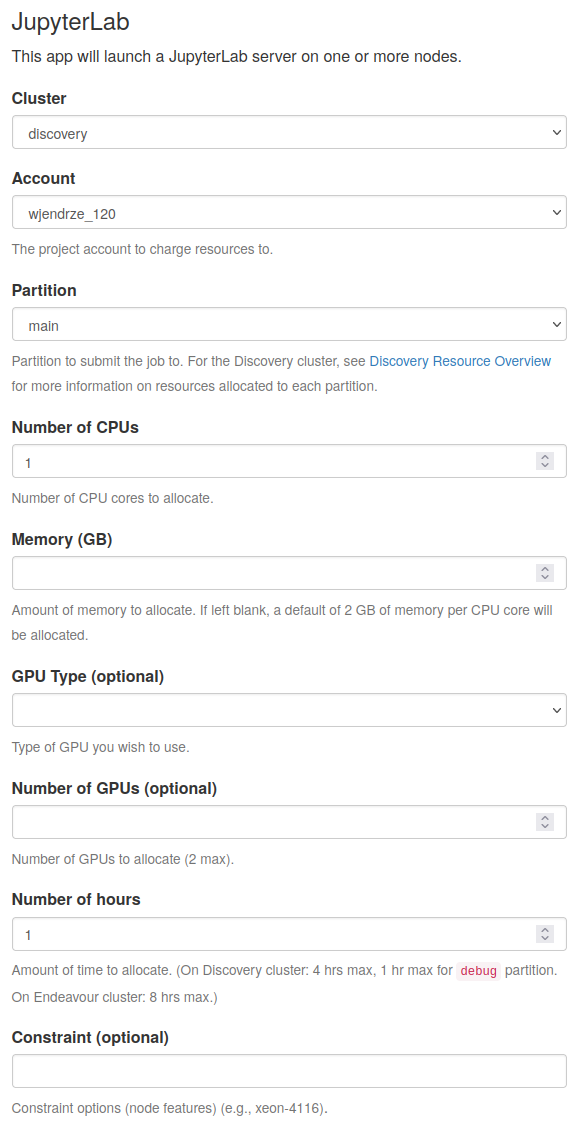
You can customize your interactive session using the following form fields:
- Cluster: Select either the general-use Discovery cluster or the Endeavour condo cluster. You must belong to a project with access to the Endeavour cluster in order to select this cluster; otherwise, you will receive an
sbatcherror (Invalid account or account/partition combination specified). - R version (RStudio only): Select from the available R versions in the dropdown.
- Account: The project account to charge resources to. The dropdown should contain all projects you are a member of, and they will be of the form <PI_name>_<project_ID>.
- Partition: The cluster partition to submit the job to. See the Discovery Resource Overview for more information on the different partitions on Discovery. Depending on the partition you choose, you may not see all of the form fields in this list.
- Number of CPUs: Number of CPU cores to allocate for your session. The maximum number of cores available depends on the partition selected above.
- Memory (GB): Amount of memory to allocate. If left blank, a default of 2 GB of memory per CPU core will be allocated.
- GPU Type (optional): Type of GPU you wish to use. This field is optional and will only be displayed for partitions that have GPU resources. Available GPU types also depend on the partition selected above.
- Number of GPUs (optional): Number of GPUs to allocate. Maximum of 2. This field is optional and will only be displayed for partitions that have GPU resources. When this field is left empty, Slurm defaults will be applied.
- Number of hours: Amount of time to allocate to your session. Maximum number of hours varies depending on cluster and partition selected. When the time allocated runs out, your session will end.
- Constraint: Node features to request (currently, CPU model).
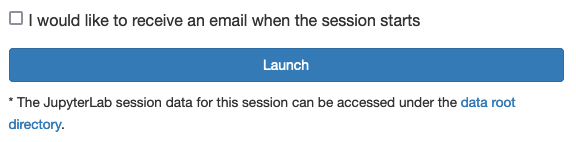
If you would like to receive an email notification when your session starts, check the corresponding checkbox at the end of the form. Otherwise, click “Launch” to launch your session:
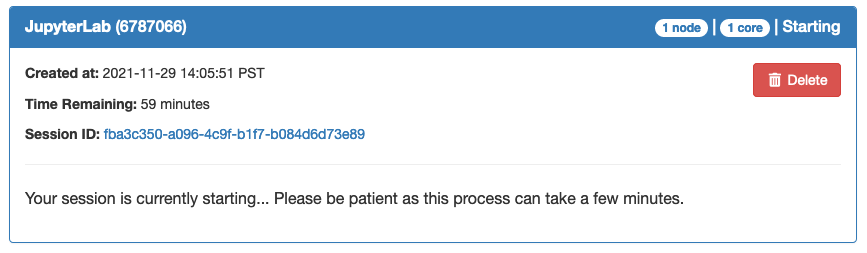
This will schedule your session in the Slurm queue. You will be taken to the My Interactive Sessions page, where your session will be highlighted in blue with a status of "Starting" or "Queued":
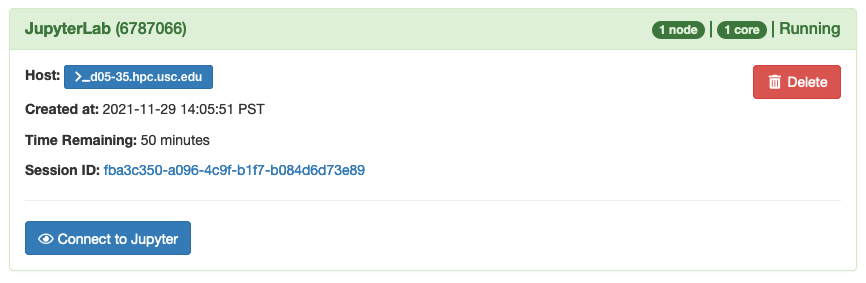
When your session is ready to use, you will see it highlighted in green with a status of "Running":
RStudio Server sessions will include a username and password for you to use to log in to RStudio:
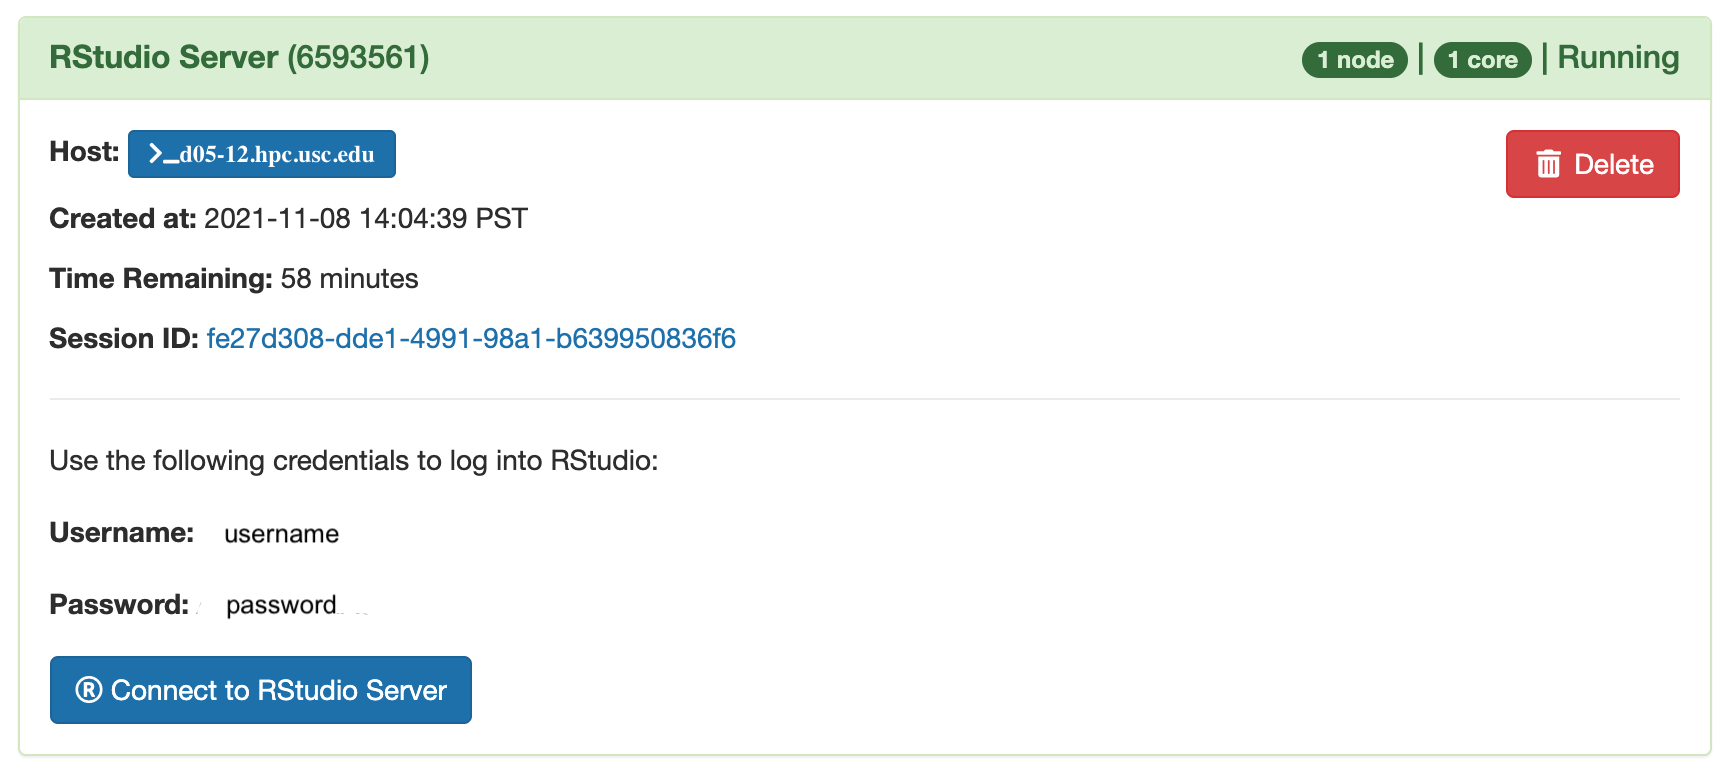
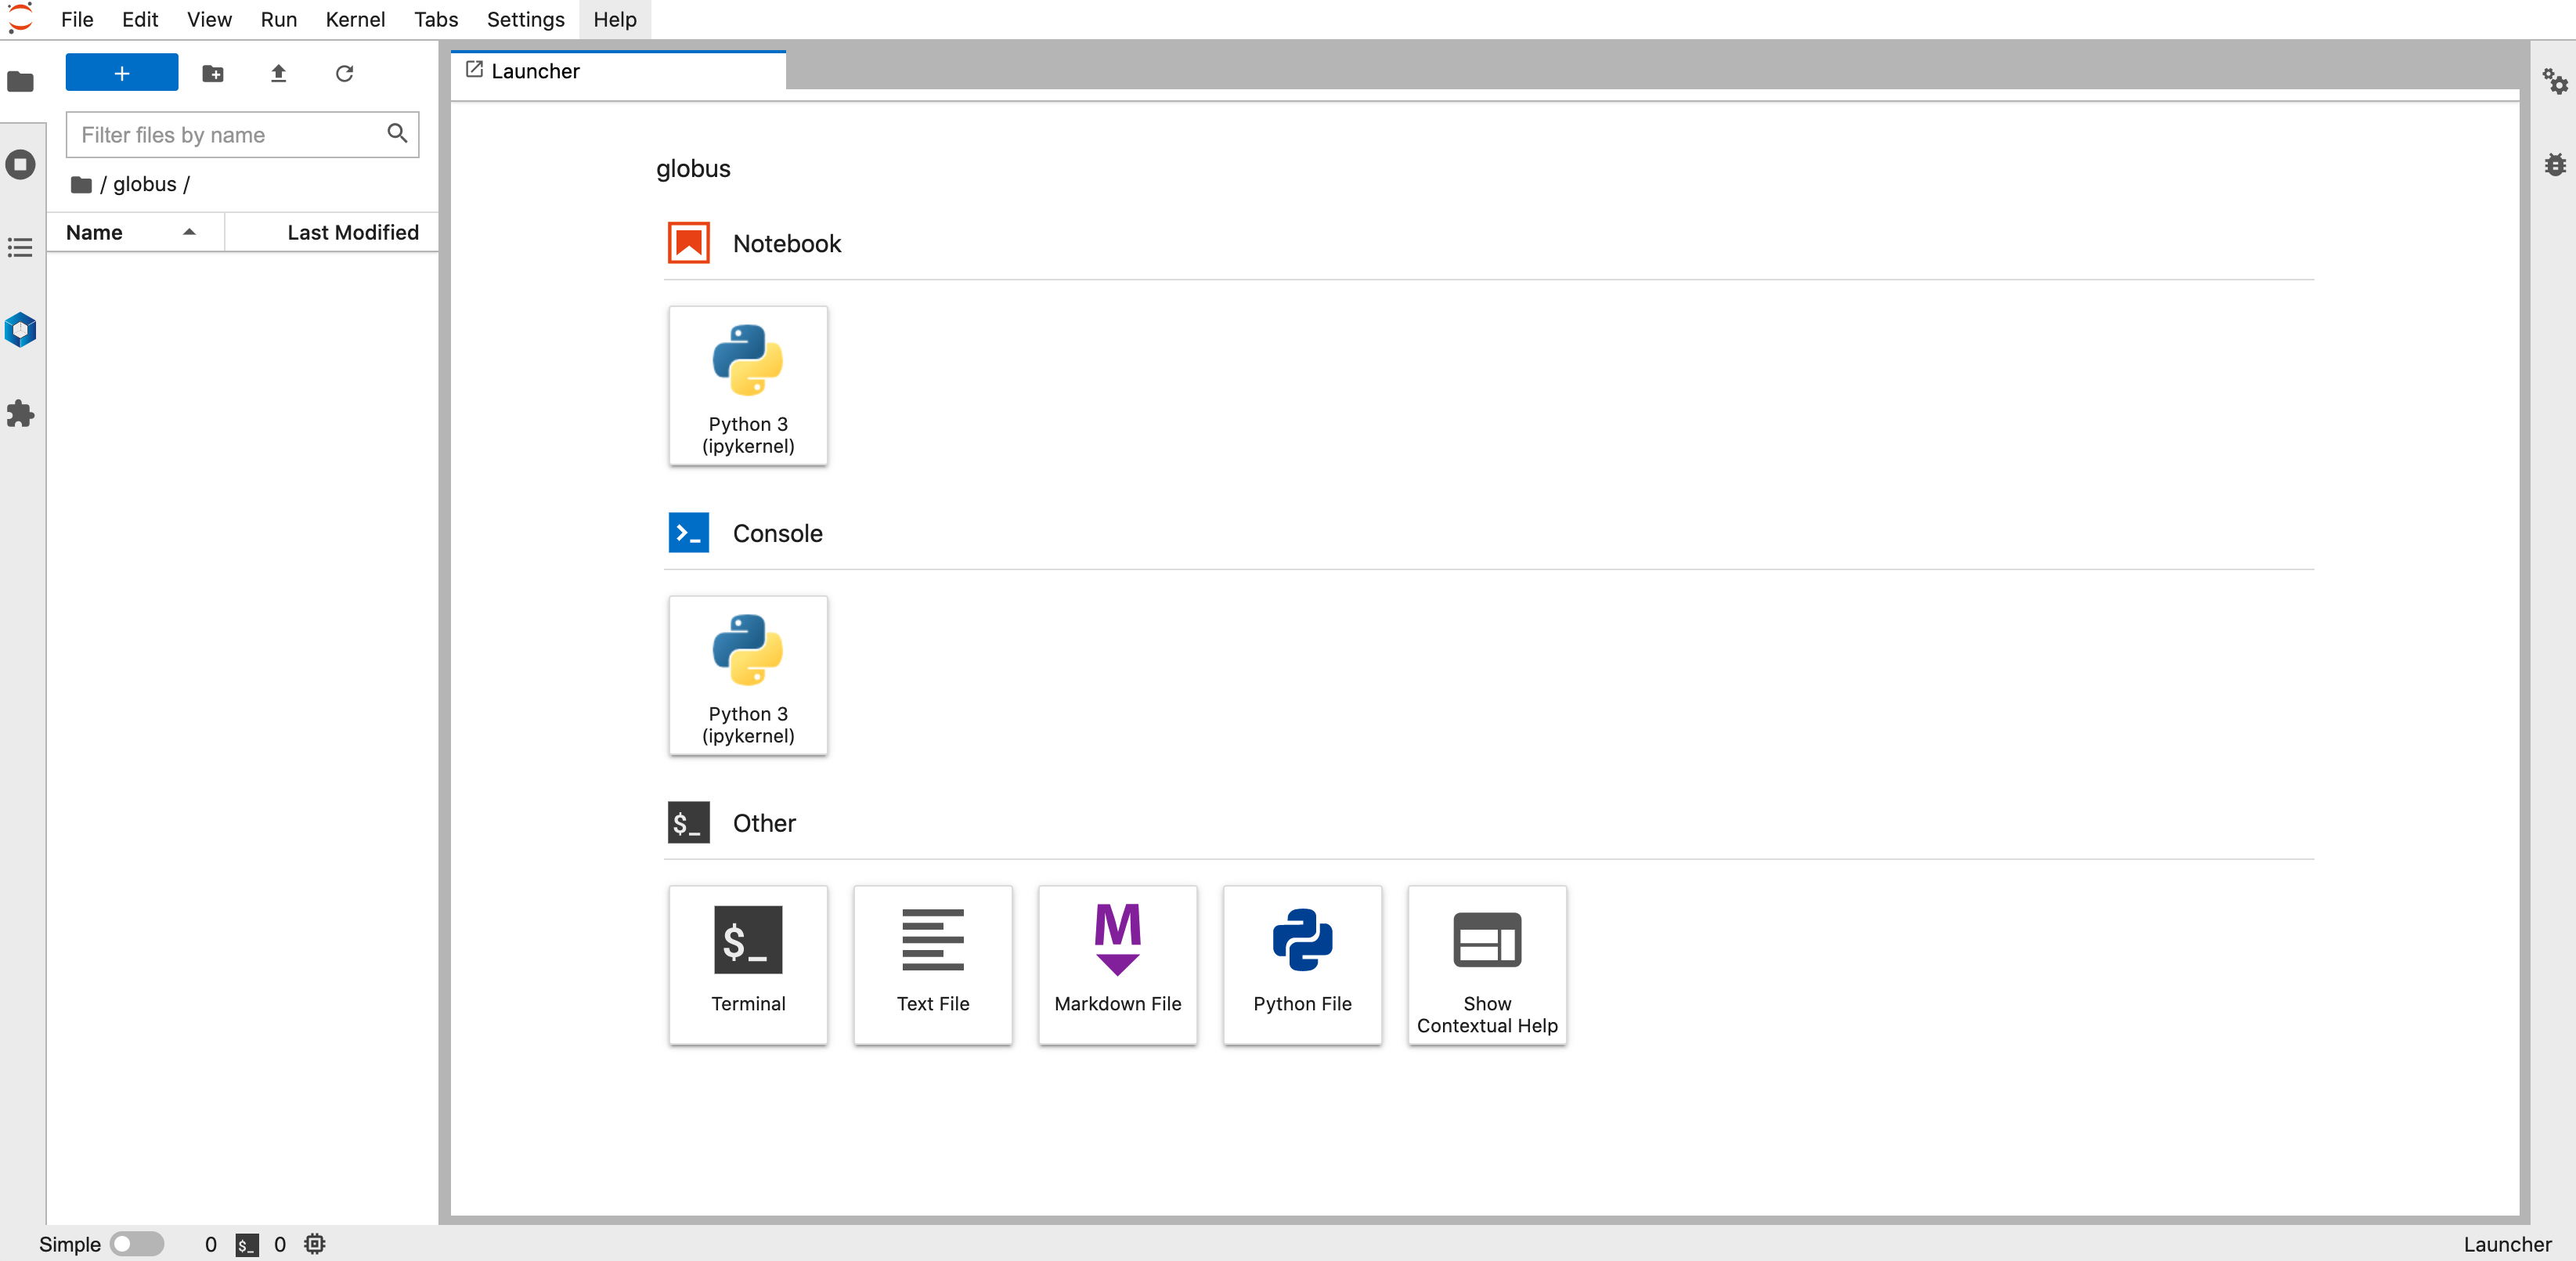
Click “Connect to Jupyter/RStudio Server” to open your session in a new browser tab:
Managing your interactive sessions
You can view all of your OnDemand interactive sessions by selecting "My Interactive Sessions" in the main OnDemand menu. Each session will include the following information:
- Host: Clicking the host will open a shell with access to the node that your session is running on.
- Created at: The date and time the session was created.
- Time Remaining: The time remaining for your session, based on the number of hours you specified when creating the session.
- Session ID: Clicking the session ID will open the file directory for the session, which contains configuration files, logs, and scripts for your Jupyter session.
- Username/Password (RStudio only): The credentials to use when logging in to RStudio Server.
If you no longer need an interactive session, you can delete it using the red "Delete" button.